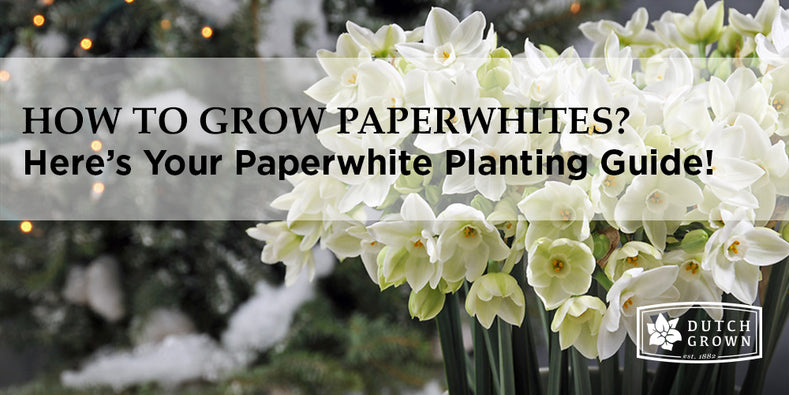
HOW TO GROW PAPERWHITES?
PAPERWHITE PLANTING GUIDE
A wonderful fragrance, quick results and super easy to grow: Paperwhites are the perfect first project for a new gardener. They are a staple for Christmas forcing, and a chance for people living in hardiness zones 8-10 to also get to enjoy flower bulbs in their gardens.
QUICK GUIDE
-
WHEN
Indoors: Plant in fall/early winter, blooms in winter
Outdoors: plant in fall, blooms in spring
-
WHERE
Well-draining soil
Indoors: Bright, direct sunlight
Outdoors: Full to partial sun
Hardiness zones 8-10
-
WATER
Once after planting
Moderately during growth
-
WIDTH & DEPTH
Indoors: 3” deep, close together - Outdoors: 3” deep, 3” apart
Arrival
When your DutchGrown Paperwhites arrive and you can’t plant them immediately, it’s important to store them correctly: unpack them right away and put them in a dry place with plenty of air circulation, where the temperature is between 50 and 70 degrees Fahrenheit.
Garden & Container Planting
Unlike other flower bulbs, Paperwhites don’t need a cold period to develop their roots and get ready for spring. This makes them ideal for indoor forcing and planting in warmer climes.
Flower bulbs are tough cookies that are easy to grow, but one thing they hate is getting their feet wet: a bulb that is ‘bathing’ in water will rot in no time. So avoid soggy soil at all cost – this means places where you can still see puddles 5-6 hours after a rainstorm. Another thing you can do is to upgrade potentially soggy soil by adding organic material such as peat, bark or manure. When it comes to planting bulbs in containers, the mantra is exactly the same: drainage-drainage-drainage. Get a pot or box with at least some drainage holes at the bottom.
Paperwhites need the sun, especially when growing indoors, where a windowsill is ideal. For outdoor growing spots with full sun or partial shade are both suitable.
The standard method for calculating the ideal depth is to dig a hole three times as deep as the bulb is high, and place the bulb at the bottom with its pointy end up. Since Paperwhites planted outdoors grow less well when they have to fight for nutrients with their fellow bulbs, it’s best to plant them 3” apart. Paperwhites growing indoors on the other hand, like to be as snug as possible, so you can plant them very closely together in their container. This also helps them support each other when they grow taller and prevents the flowers from becoming floppy.
When planting them outdoors, it’s important to water Paperwhites well so the soil can settle around them and they can develop roots quickly. Indoor Paperwhites can be grown in either soil or water. When you grow them in water only, make sure to fill the container with just enough water to touch the base of the bulb, topping up when needed.
During blooming season, you generally don’t have to water your outdoor Paperwhites, but you can water them when there hasn’t been any rain for 3-5 days.
After Paperwhites have finished blooming, don’t cut the foliage straight away: through photosynthesis the leaves will create nutrients that the bulb will be needing for its next growing season. After a few weeks the foliage will automatically yellow and die back, and then you can remove it. Now the bulb will be going dormant, and won’t need any watering until next spring.
Growing Paperwhites indoors in soil:
- At the end of the summer or the start of fall, plant the Paperwhite bulbs in a well-draining container.
- Plant the Paperwhites with their point ends up, with 1” of the tip of the bulb sticking out of the soil. Place the bulbs very closely together so they won’t get floppy once they grow taller.
- After planting, water well and place the pot in a brightly lit, warm spot. Make sure to turn the pot every day so that the plants will grow straight.
-
After three to six weeks you’ll have a lovely pot of tender white flowers that smell divine. If you don’t like a strong fragrance indoors, Paperwhite Inbal is just as beautiful but without the aroma.
Growing Paperwhites indoors in water:
- Fill the bottom of a large, decorative vase with pebbles or gravel and place the bulbs closely together on top of it, with their pointy ends up.
- Water until it just reaches the base of the bulbs.
- Place the vase in a brightly lit but not too warm spot.
- Make sure to keep topping up the water as it evaporates. After about 6 weeks you’ll have a lovely, living bouquet of Paperwhites that will fill your house with its wonderful fragrance.
Growing Paperwhites outdoors in zones 8-10:
- In late fall or early winter, find a sunny spot with well-draining soil and plant the Paperwhite bulbs in the soil with their pointy ends up, 3” deep and 3” apart. For maximum impact it’s a good idea to plant them in clumps of 7-10.
- Water well after planting and wait for spring, when they’ll burst forth form the ground in tender, fragrant groups.
Non-stop Paperwhites
If you simply can’t get enough of these little white stars, you can plant a new batch every 2-3 weeks from October all the way through to January, for a continuous indoor spring feeling all winter long.

